In this article we’re gonna talk about how you can use NodeJs and download files like .csv, .pdf, .jpg and any type of file you need to download.
When working with NodeJs Web Scraping projects you will most likely end up at a point where you need to download a file and save it locally, so I’m going to show you exactly how 💻.

Table of contents
- Prerequisites
- Writing the Code
- Why promises?
- When to use GZIP option?
- Headers
- Cookies or Authorization Tokens
- Conclusion
- Alternatives
- Want to learn more?
Prerequisites
In order to start working on it and implementing it, you must at least have the request library for NodeJs installed and ready to go.
Also if you want to learn more on how to build a simple scraper with NodeJs you can follow the 4 Easy Steps to Web Scraping with NodeJs guide that I’ve posted a while back.
Writing the Code
Lets get right into it and see how we can actually do this and then I will explain you the actual process behind it if you want to know more.
const request = require('request');

/* Create an empty file where we can save data */
let file = fs.createWriteStream(`file.jpg`);

/* Using Promises so that we can use the ASYNC AWAIT syntax */
await new Promise((resolve, reject) => {
    let stream = request({
        /* Here you should specify the exact link to the file you are trying to download */
        uri: 'https://LINK_TO_THE_FILE',
        headers: {
            'Accept': 'text/html,application/xhtml+xml,application/xml;q=0.9,image/webp,image/apng,*/*;q=0.8',
            'Accept-Encoding': 'gzip, deflate, br',
            'Accept-Language': 'en-US,en;q=0.9,fr;q=0.8,ro;q=0.7,ru;q=0.6,la;q=0.5,pt;q=0.4,de;q=0.3',
            'Cache-Control': 'max-age=0',
            'Connection': 'keep-alive',
            'Upgrade-Insecure-Requests': '1',
            'User-Agent': 'Mozilla/5.0 (Macintosh; Intel Mac OS X 10_12_6) AppleWebKit/537.36 (KHTML, like Gecko) Chrome/68.0.3440.106 Safari/537.36'
        },
        /* GZIP true for most of the websites now, disable it if you don't need it */
        gzip: true
    })
    .pipe(file)
    .on('finish', () => {
        console.log(`The file is finished downloading.`);
        resolve();
    })
    .on('error', (error) => {
        reject(error);
    })
})
.catch(error => {
    console.log(`Something happened: ${error}`);
});
So, lets start to break it down and see what this all means 🔥
Why promises?
The previous snippet is basically a Promisified version of the downloading of an item from anywhere on the web.
I like to work with Promises because I can use Async and Await on them which makes my code more clean and working as I need it to. Stop going in the callback hell and stop using all the “shitty” snippets from around the web that lead you to it. 🔥
I am easily doing this by attaching a resolve() and reject() on the actual events that are coming from the request library. It is pretty straight forward and the logic would be that the promise will resolve itself once the finish callback is fired and we are rejecting when it fires an error callback.
When to use GZIP option?
If you can see in the code, I’ve written gzip set to true and that is because most of the websites have GZIP enabled by default nowadays.
What is GZIP? GZIP is basically a compression mechanism to help reduce the actual weight / data being transferred on a request ( you can search more on this on google if you want a deeper explanation )
So if you are not enabling GZIP in the request options then the actual response from the server that you will get is compressed gibberish that will result in a corrupt file.
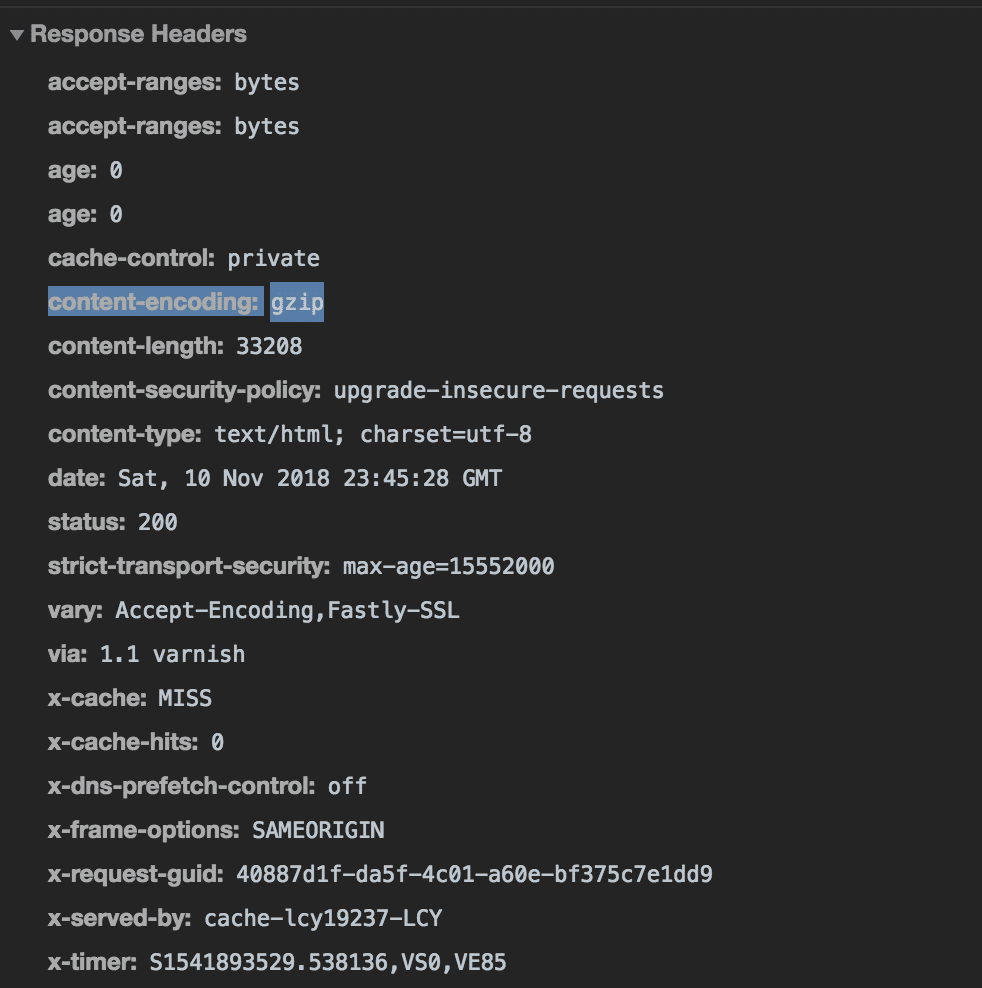
You can check if a website uses GZIP by easily opening the DevTools in Chrome and checking a network request on the specific website that you are scraping / wanting to do the download of the file.

Headers
Also make sure the headers that you are setting are correct and they are in sync with what a normal request to that file would look like.
Here’s what I’m saying.
Again, with the DevTools of Chrome, you can go to the Network tab and try to do a request to the actual file that you’re trying to download.
Now, inspect that request and check what are the actual Request Headers of the request and make sure they are in sync with your headers from your code.
Cookies or Authorization Tokens
Do not forget to set the Cookie header or the Authorization Tokens if you are dealing with content only accessible to logged in users.
You can easily do this by adding another parameter in the headers object just like this
'Cookie': 'key_of_cookie=value1; key_of_cookie2=value;
Conclusion
Lets end this with an overall recap of what is happening with this snippet and how it is working step by step.
- It creates a new empty file
- It creates the new request with the custom parameters and headers for it
- It sends the actual request
- It “pipes” / downloads all the data in the created file
- Upon completion it will trigger the resolve of the Promise
- If an error happens, it will trigger the reject and console log the problem
Pretty simple, right?
Alternatives
There are plenty of alternatives out there, like: http.get and many other libraries. I’ve mentioned this one because this is the most stable that I’ve used and never had a problem with it.
Want to learn more?
Also if you want to learn more and go much more in-depth with the downloading of files, I have a great course with 7 extra hours of great content on web scraping with nodejs.